
Homemade Boxed Cake Mix Recipe to Beat Shrinkflation

Shrinkflation is gross. I don’t normally talk about current events and I never share my own recipes, but I was so so disappointed when I found out Betty Crocker has been shrinking their box cake mix from 18 to 13.25 ounces while still expecting it to make the same size cake.
How they do it I don’t even wanna know, but it’s terrible. There’s really no other word for it. I don’t like being critical, and I do hope Betty Crocker does something to make it right, but in the mean time, I’m done giving them a dollar until they fix it.

That said, almost everyone needs to have a box of quick and ready cake mix you can whip up at the last minute with just water, oil, and eggs, so instead of finding a clever way of doctoring up Betty Crocker’s, I decided to make my own box cake mix instead. It took a little bit of experimentation, but I think I’ve come up with a really delicious mix.
With quality ingredients and a few unique gourmet twists, you’ll have a box of delicious fluffy sweet cake, ready in minutes. So let me show you how I did it.
LET’S GET SIFTING!

It all starts with really high-quality cake flour. I used King Arthur unbleached cake flour because I love that it’s unbleached. If you don’t have cake flour, you can totally use all purpose flour, but the cake won’t be quite as tender and fluffy. There is a way of turning all purpose flour into cake flour by adding cornstarch, so I made a post exposing how.
HOW TO MAKE CAKE FLOURThen it’s time for sugar. I use unrefined cane sugar because of its rich flavor. Next is the first secret ingredient that really elevates the flavor of the cake - powdered buttermilk.

Most dry cake mixes use powdered milk, but buttermilk as a delicious tangy flavor that really makes a difference. Even if you’ve never used powdered buttermilk, it’s very easy to find you can get it at most grocery stores. My favorite is made by King Arthur. It has great flavor and you can buy it in a larger package than most.
Next is baking powder and because of that acidic buttermilk, you’ll want to add a touch of baking soda as well. A bit of salt, then it’s time to add the final secret ingredient that will take your cake to a whole new gourmet level.
VANILLA BEANS ARE WORTH IT

Vanilla beans. This may seem a little indulgent, and it is, but it’s totally worth it, and I will show you a trick to maximize the amount of flavor you get from each bean. It starts with very high-quality grade a vanilla beans, and where are you source them really matters.
There is a huge difference in quality between vendors and a lot of sketchy sources out there, so I always buy from the same place to make sure they have been stored properly and sourced responsibly. Slo Food Group has been my favorite for years, and I highly recommend them. I posted all about why I love there vanilla beans, so check it out by clicking the button below :
MY FAVORITE VANILLA BEANSI use grade A vanilla beans. If you’re not familiar, grade A beans are great for using directly in a recipe. They are moister, fresher, and softer. Grade B are great, too, but they are much drier, which is actually a good thing for making extract, just not for baking. And then there’s splits. Splits are extra dry and often slightly damaged or broken.

Whatever grade you choose, here’s the trick- use the whole bean pod and all. If you’ve ever scraped a vanilla bean, you may notice it’s almost impossible to get all the beans scraped off the pod. It’s fine if you’re going to use the pod to make your own extract, but did you know that you can use the entire vanilla bean pod when you’re baking? Most people don’t know that’s how vanilla bean powder is made, and it’s super easy. I will show you how.
HOW TO MAKE VANILLA BEAN POWDER
First, if you use grade A or B, you’ll need to dry them out of bit. High-quality vanilla beans are very moist, so you will need them a bit dryer to pull this off. Unless you use splits, they’re already dry enough.

Place a few in a single layer on parchment paper in your oven at 125° F for about 90 minutes. If your oven doesn’t go that low, you can set it to its lowest setting and leave the door cracked just pop a thermometer inside to monitor things.
A dehydrator would probably work as well, but I use the open door oven method. Once they’re cooled, cut off the ends, and chop them into roughly one inch pieces.

Then pop them into either a spice grinder, if you have one, or I thrifted a coffee grinder just for grinding spices. Just make sure it’s a blade coffee grinder. Even dried, vanilla beans will gum up a burr grinder, so look for a propeller blade type grinder.
Grind them into a fine powder, then sift to remove any large pieces. You can always return those to the grinder for another pass if you really want to maximize your results.

That’s it! It may seem odd at first, but as long as it is finely ground, there is a ton of flavor in the pod itself, and it’s the best way to get the biggest bang for your buck. Vanilla beans are undeniably a little pricey, but absolutely worth every penny, so it’s nice knowing you’ve squeezed every penny out of them.
Now it’s time to add your vanilla bean powder to your cake mix! It’s potent stuff so you a teaspoon is more than enough to equal a tablespoon of extract.

I’m not one to sift very many things, but I do recommend you sift things together in this case. Mostly because the buttermilk powder tends to want to clump together, so it really helps to get a smooth consistency later. You won’t need to sift it again later, just this once to get everything equally distributed.
ALL DONE - SEAL IT UP FOR A FUTURE CAKEMERGENCY!
And you’re done! Time to package up your cake mix for a rainy day. You can store them in any airtight container. Mason jars are cute if you want to give it away as gifts, but I really like using reusable silicone bags.

And to finish things off, I label my bags with the recipe for finishing the cake. Just like Betty Crocker’s, all you need is water, oil, and eggs.
What’s great is, you can make white or yellow cake with this recipe. For white, use oil, for yellow, swap it for butter. That’s it. Also, if you want to have more flavors of cake mix on hand, I’ve developed several more, like Funfetti, chocolate, lemon, and even spice cake, so be sure to check out the notes at the bottom of the recipe below.

This is a video I wish I didn’t have to make, to be honest, but it was a really fun adventure, and while nothing would make me happier than Betty Crocker changing their mind and making things right, at least you can have a delicious and easy option ready for you in a cake emergency.
KITCHENWARE USED IN THIS RECIPE


Other Posts in this Series
-
Thanksgiving Leftovers Turkey Shepherd’s Pie
-
Vintage Pickled Watermelon Rind – A Sweet & Spiced Old-Fashioned Treat
-

Vintage Chicken Curry Rice Casserole – Creamy Comfort Food Classic
-
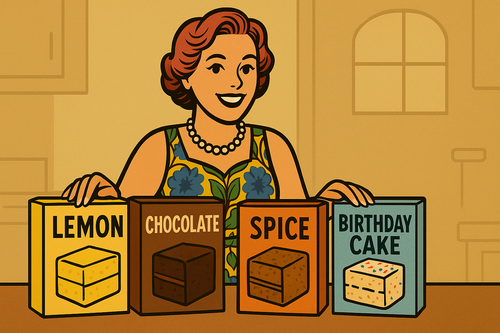
Fighting Shrinkflation with Homemade Boxed Cake Mix Bonus Flavors
-
Vintage Sweet Potato Biscuits – Soft, Southern & Naturally Sweet
-

Vintage Angel Flake Biscuits – Fluffy, Yeasted & Golden
-
America’s Sweetheart, Pumpkin
-

Vintage Leftover Ham Recipes Using Ground Ham


